Start here
Submission workflow
Use Upload to obtain a fileId, StartImport to create a dataset, GetStatus to monitor progress, and SubmitDatasetToCdx when the import is ready.
Use Upload to obtain a fileId, StartImport to create a dataset, GetStatus to monitor progress, and SubmitDatasetToCdx when the import is ready.
Browse required parameters, optional values, gotchas, and usage notes in EPA-style expanding cards.
Use the Examples tab to copy starter code for Python, C#, Java, and RStudio plus a common signing helper pattern.
Browse each WQX Web API method with its required and optional parameters, supported values, notes, gotchas, and quick-start code samples for building signed requests.
Use the quick path when you want WQX to import, export, and submit to CDX for you. Use the full path when you want to stop after import, check the dataset, submit to CDX manually, and review logs if anything fails.
This is the fastest path for a normal tabular import. The key setting is uponCompletion=2, which tells WQX to start export and submit to CDX when the import finishes.
GetStatus needs a datasetId. The Upload method only returns a fileId, so status polling starts after StartImport.Call Upload with the file name in the path and send the raw file bytes in the body. Save the returned fileId; you need it for the next step.
fileName — required path parameter. Use the exact file name and extension that you are uploading.X-UserID — your WQX user ID used to build the signed headers.X-Stamp — a fresh UTC timestamp in the WQX format for each request.X-Signature — the HMAC signature generated from user ID + timestamp + full URL + HTTP method.POST https://cdx.epa.gov/WQXWeb/api/Upload/YOUR_FILE_NAME_HERE X-UserID: YOUR_USER_ID_HERE X-Stamp: CURRENT_UTC_TIMESTAMP X-Signature: GENERATED_SIGNATURE Content-Type: application/json Body: raw bytes from YOUR_FILE_NAME_HERE
fileId. Keep it for StartImport. If you have supplemental files packaged as a zip, upload that separately with UploadAttachment and save the returned attachmentFileId.Call StartImport with every required query parameter. For the quick path, set uponCompletion=2 so WQX will export and submit to CDX after a successful import.
importConfigurationId — required. The import configuration to run.fileId — required. The file identifier returned by Upload.fileType — required. One of CSV, TAB, TILDE, PIPE, XLS, or XLSX.newOrExistingData — required. 0 = new and/or existing, 1 = new only, 2 = existing only.uponCompletion — required. Use 2 to start export and submit to CDX.uponCompletionCondition — required. Common choice: 1 for no import errors before moving on.GET https://cdx.epa.gov/WQXWeb/api/StartImport?importConfigurationId=YOUR_IMPORT_CONFIGURATION_ID_HERE&fileId=YOUR_FILE_ID_HERE&fileType=YOUR_FILE_TYPE_HERE&newOrExistingData=0&uponCompletion=2&uponCompletionCondition=1
StartImport returns the datasetId you will use with GetStatus. You can also include optional values like attachmentFileId, worksheetsToImport, or ignoreFirstRowOfFile when needed.Call GetStatus with the returned datasetId. Poll about once per minute until the dataset reaches a final state such as Completed at CDX or an error state that requires review.
datasetId — required. The dataset identifier returned by StartImport.GET https://cdx.epa.gov/WQXWeb/api/GetStatus?datasetId=YOUR_DATASET_ID_HERE
GetStatus too frequently can return Maximum Calls Exceeded.uponCompletion=0, review status, submit to CDX manually, and inspect logsUse this flow when you want manual control between stages. It also shows the alternate direct-XML submission method, SubmitFileToCdx, for files that are already WQX XML.
Start with Upload. This step stores the file on the WQX Web server and returns a fileId. That fileId is what you pass into StartImport or, for direct XML submission, SubmitFileToCdx.
POST https://cdx.epa.gov/WQXWeb/api/Upload/YOUR_FILE_NAME_HERE
X-UserID: YOUR_USER_ID_HERE
X-Stamp: CURRENT_UTC_TIMESTAMP
X-Signature: GENERATED_SIGNATURE
Content-Type: application/json
Upload gives you a fileId, not a datasetId. That is why the first usable GetStatus call comes after StartImport or after SubmitFileToCdx returns a dataset to track.For a manual workflow, call StartImport with uponCompletion=0. That tells WQX to stop after import so you can review the dataset before any submission to CDX.
importConfigurationId — required import configuration ID.fileId — required upload file ID from step 1.fileType — required file type that matches the uploaded file.newOrExistingData — required import mode.uponCompletion=0 — required for the stop-after-import flow.uponCompletionCondition — required condition that determines whether the next completion action would be allowed.GET https://cdx.epa.gov/WQXWeb/api/StartImport?importConfigurationId=YOUR_IMPORT_CONFIGURATION_ID_HERE&fileId=YOUR_FILE_ID_HERE&fileType=YOUR_FILE_TYPE_HERE&newOrExistingData=0&uponCompletion=0&uponCompletionCondition=1
datasetId. Save it because the rest of the dataset workflow uses that value.Check the dataset until the import finishes. Typical intermediate values include waiting/importing states; a successful import eventually reaches an imported/export-ready state.
GET https://cdx.epa.gov/WQXWeb/api/GetStatus?datasetId=YOUR_DATASET_ID_HERE
GetDocumentList to review the generated logs.Choose the submission method that matches your workflow. Imported tabular datasets use SubmitDatasetToCdx. Already-formed WQX XML files can be uploaded and sent directly with SubmitFileToCdx.
Use this after StartImport when you already have a datasetId.
GET https://cdx.epa.gov/WQXWeb/api/SubmitDatasetToCdx?datasetId=YOUR_DATASET_ID_HERE
Use this when the uploaded file is already a WQX XML file and you want to submit it without a tabular import.
GET https://cdx.epa.gov/WQXWeb/api/SubmitFileToCdx?fileId=YOUR_FILE_ID_HERE
SubmitDatasetToCdx is for datasets; SubmitFileToCdx is for uploaded XML files.After you start CDX submission, continue polling with GetStatus until the dataset reaches its final CDX status.
GET https://cdx.epa.gov/WQXWeb/api/GetStatus?datasetId=YOUR_DATASET_ID_HERE
Completed at CDX. If the status shows a failure or stops progressing, use the logs step below.When a dataset fails import, export, or submission, call GetDocumentList with the same datasetId. The response can include processing artifacts such as reports or logs that explain the error.
datasetId — required. Use the dataset you are troubleshooting.GET https://cdx.epa.gov/WQXWeb/api/GetDocumentList?datasetId=YOUR_DATASET_ID_HERE
Use these examples to build real integrations or to turn a generated request from the Workbench into executable application code.
Build a signed WQX request, keep reusable presets in the browser, and generate request artifacts for cURL, PowerShell, fetch, and raw header inspection.
Select your EPA environment, enter WQX credentials, choose a method, and generate signed request artifacts.
Select a method, review required and optional parameters, and build the request.
Learn how registered WQX Web users obtain the private encryption key used to sign authenticated WQX Web API requests.
The WQX Web API is available to registered users within the WQX Web application. Before using the API, each user must obtain a unique 88-character Private Encryption Key associated with a registered WQX Web user account.
Developers and programmers may initially use their private, personal WQX Web account for development and testing. For production applications, request a dedicated application account by emailing the WQX Web support team to register an application WQX Web user account.
All API access is through an authenticated Uniform Resource Identifier (URI). Data is submitted by sending an HTTP GET or POST request to the URI with the appropriate parameters supplied.
The minimum authentication values for every request include the UserID, Timestamp, and Signature. The signature is generated from the user ID, timestamp, full URI, and the HTTP method being invoked.
In WQX Web, open the Setup menu and select My User Account Details. This opens the account area where the private encryption key is managed.
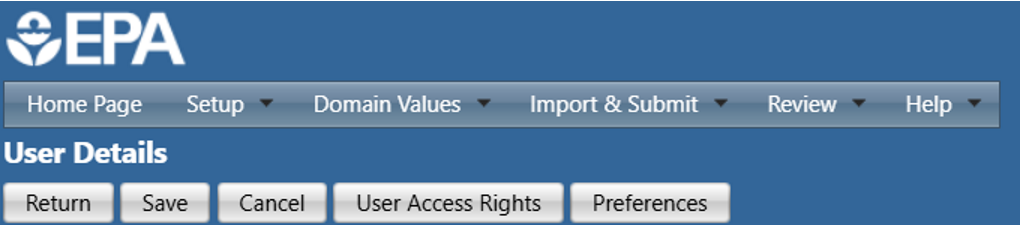
On the User Details page, locate Private Encryption Key and choose Create New Key.

When prompted, confirm that you want to create a private encryption key for calling web services.
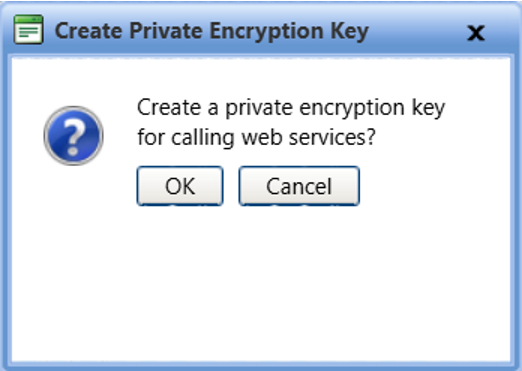
After the key is created, the private key will display under Account User Details. Copy and store it securely so it can be used by the Workbench or application code when generating signed requests.